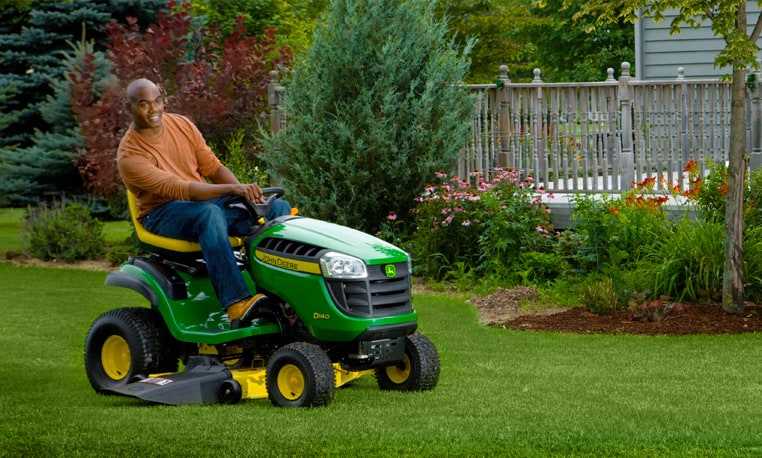
The John Deere 100 lawn tractor, manufactured from 1975 to 1978, was a compact workhorse primarily designed for mowing, with an 8HP Briggs & Stratton 318cc 1-cyl gasoline engine, a 3-speed gear transmission, and manual steering. It featured a 34″ mid-mount mower deck, but also could mount a snowblower or a blade, making it a versatile choice for various yard chores. Among its common issues are starting problems, where ensuring the brake pedal is fully depressed and the blade engagement lever is disengaged are crucial for startup, as well as checking for proper fuel levels and secure spark plug connections.
Understanding and addressing common problems with this lawn tractor is vital whether you’re considering a purchase or already own one and are facing some issues. This post aims to delve into the 8 frequent problems, their causes, and troubleshooting steps.
Igra-World has a rich experience in dealing with lawn tractors .Our seasoned mechanics, backed by years of hands-on work and continuous learning, have often echoed the sentiments of our customers who appreciate the simplicity in servicing the 100 Series, especially when it comes to oil changes as they are a quick 2-minute task. A customer once shared, “The easy maintenance keeps me coming back to John Deere. Even after hitting a fair share of rocks and experiencing a few brake adjustments over the years, the mower’s performance is still top-notch!”.
How to Troubleshoot Most Common Issues:
1. Starting Issues (severity: medium) How to fix: Ensure the brake pedal is fully depressed, blade engagement lever is disengaged, and check for proper fuel levels and secure spark plug connections.
2. Poor Brake Performance (severity: medium) How to fix: Regular brake adjustments are necessary, especially after encounters with rough terrain.
3. Pulley Squealing Noises (severity: low) How to fix: Check the assembly from which the noise originates; replacement of worn-out components may be necessary.
4. Hydraulic System Overheating (severity: high) How to fix: Allow the transmission to cool, check and possibly replace the gearbox oil, and inspect the clutch for issues.
5. Difficulty Shifting (severity: medium) How to fix: Replace the transmission pressure sensor and check for oil leaks in the servo assembly of the particular speed.
6. Battery Issues (severity: low) How to fix: Replace the battery as needed, especially if it’s been a few years or if the mower is used in extreme conditions.
7. Deck Wear and Tear (severity: medium*) How to fix: Regular inspections for damage, ensuring clean and well-lubricated components, and replacing worn-out parts can prolong the deck’s lifespan.
8. Ineffective Headlights (severity: low*) How to fix: Upgrade to higher lumen bulbs or consider additional lighting solutions for better visibility during low light conditions.

1. Starting Issues
The most common culprits causing starting issues are a mismanaged fuel system, faulty ignition system, drained battery, and malfunctioning engine sensors.
Jumping right into the heart of the matter—the primary mechanical components involved in the starting woes of the tractor entail its fuel system, ignition system, battery, and engine sensors. The 100 Series is powered by an 8HP Briggs & Stratton 318cc 1-cyl gasoline engine, with a fuel tank capacity of 1.25 gallons. A key part of its ignition system is the spark plug, which, along with the ignition coil, is crucial for initiating the engine’s operation. It’s imperative that the spark plug is securely connected and functioning correctly, as any misfire can prevent the engine from starting. Similarly, ensuring that the fuel system is free from blockages or clogs is essential for smooth operation. The tractor’s battery, rated at 12 volts with a cold cranking amperage of 135, is another cornerstone for ensuring a successful start—any issues with the battery connections or a weak battery can thwart the starting process.
Lastly, the engine sensors, specifically the crankshaft position sensor and the engine control module (ECM), play pivotal roles in orchestrating the starting sequence. Any malfunction within these sensors can throw a wrench in the works, disrupting the starting process. This model also features a manual 3-speed gear transmission, and any glitches in the transmission system could potentially contribute to starting issues, although it’s a less common scenario.
How to Fix Starting Issues:
- Check Fuel Level: Ensure the fuel tank has sufficient fuel. Clean fuel is imperative—replace old or contaminated fuel.
- Inspect Fuel System: Look for blockages or clogs in the fuel filter and fuel lines that might prevent fuel from reaching the engine.
- Verify Ignition System: Ensure the spark plug and ignition coil are functioning correctly and securely connected.
- Assess Battery Condition: Examine battery connections and voltage level. A weak or discharged battery can hinder the starting process. Charge or replace the battery if necessary.
- Check Engine Sensors: Diagnose the crankshaft position sensor and the engine control module (ECM) for proper functionality.
- Check Brake Lever and Blade Engagement Lever: Ensure the brake pedal is fully depressed, and the blade engagement lever is disengaged before attempting to start the tractor.
- Inspect Transmission: Although less common, ensure the 3-speed gear transmission is functioning correctly, particularly if the tractor fails to move post starting.
- Consult a Mechanic: If after performing the above steps the issue persists, it might be prudent to consult a professional mechanic for a thorough inspection and diagnosis.
2. Poor Brake Performance
The most common issues relating to poor brake performance are likely due to inadequate brake adjustments, particularly after rough terrain encounters.
The John Deere 100 series, featuring an 8HP Briggs & Stratton 318cc 1-cyl gasoline engine and a 3-speed gear transmission, is built for a smooth ride across various terrains. Yet, the brake system can fall short post rough terrain encounters, necessitating regular adjustments. The brake and clutch share a pedal, which, if not functioning correctly, can lead to decreased control—especially downhill, where pressing a non-functional brake pedal might disengage the clutch, speeding up the tractor inadvertently.
The intricacy of the brake mechanism ties with the engine operation, as starting the engine requires the brake lever to be pressed down firmly. Even the Power Take-Off (PTO) lever needs to be in the “Off” position for the engine to start. These interlinked systems highlight the necessity of a well-adjusted brake system to ensure both the safety and functionality of the 100 series tractor.
How to Fix Poor Brake Performance:
- Inspect the Brake System: Examine the brake pedal and linkage for any obvious damage or disconnections.
- Adjust the Brake Pedal: If the brake pedal has too much free play or is not engaging the brakes properly, it may need adjustment.
- Check the Brake Pads: Ensure the brake pads are in good condition and replace them if they’re worn out.
- Lubricate Linkages: Lubricate the brake linkages to ensure smooth operation.
- Consult the Manual: Refer to the 100 series manual for specific brake adjustment procedures.
- Professional Inspection: If the problem persists, it might be wise to have a professional inspect and adjust the brake system to ensure safety and proper operation.
3. Pulley Squealing Noises
The most common issue leading to pulley squealing noises is typically related to worn out or damaged components within the pulley assembly, especially the bearings or the belt.
The 100 series lawn tractor operates with a mid PTO independent, mechanical idler pulley, alongside a 34″ mid-mount mower deck. However, with extensive use, it’s prone to wear and tear over time, particularly within the pulley assembly which is crucial for power transmission from the engine to the mower deck. A faulty pulley system could lead to squealing noises—indicative of a mechanical discrepancy that necessitates immediate attention. Ignoring this could lead to further damage or even a complete breakdown.
The core culprits behind these squealing noises often boil down to worn-out bearings, a loose or damaged belt, or misaligned pulleys. The squealing is more than just a nuisance—it’s a cry for help from your lawn tractor signaling underlying mechanical issues that could escalate if left unchecked!
How to Fix Pulley Squealing Noises:
- Ensure Safety: Disconnect the spark plug for safety before you begin any troubleshooting or repairs.
- Inspect the Belt: Check the condition of your mower deck belts for any signs of wear, damage, or improper tension.
- Check Pulley Bearings: Inspect the bearings within the pulley system for any wear or damage, replace any bad pulley bearing restricting pulley rotation or making the pulley wobbly.
- Examine Pulleys & Idler Pulley Brackets: Ensure that all pulleys and idler pulley brackets are in good condition and properly aligned.
- Consult a Mechanic if Necessary: If the squealing persists or if you’re unsure about any aspect of the troubleshooting process, it’s wise to consult with a professional mechanic. They may need to remove and rebuild the entire assembly from which the sound is originating to resolve the issue.
- Regular Maintenance: Regular maintenance checks can help prevent the recurrence of squealing noises. This includes ensuring that all mechanical components are well-lubricated and replacing any worn-out parts promptly.
4. Hydraulic System Overheating
The most common culprits causing hydraulic system overheating are low hydraulic fluid levels, dirty hydraulic fluid, and clogged hydraulic filters.
The John Deere 100 Series lawn tractors can stumble upon issues like overheating. Several root causes have been identified for this irksome problem. Firstly, low hydraulic fluid levels can lead to inadequate lubrication and cooling of the system, escalating the heat levels. Secondly, the quality of hydraulic fluid can deteriorate over time, especially if it’s dirty or contaminated, which lessens its efficacy in heat absorption.
Lastly, clogged hydraulic filters impede the fluid flow, again contributing to overheating. This problem is not to be taken lightly as it can lead to transmission system failure, emphasizing the importance of regular maintenance to mitigate such issues.
How to Fix Hydraulic System Overheating:
- Check Hydraulic Fluid Levels: Regularly ensure that the hydraulic fluid level is within the recommended range. Replenish if it’s low!
- Change The Hydraulic Fluid: If the hydraulic fluid has become dirty or contaminated, change it as recommended by the manufacturer.
- Replace Hydraulic Filters: Examine the hydraulic filters and replace them if they are clogged due to dirt or debris, as this might lead to overheating.
5. Difficulty Shifting
The most common issues causing difficulty in shifting in lawn tractors are usually associated with low fluid levels, worn belts, damaged shift levers, and clogged filters, or a malfunctioning shift cable or a damaged linkage.
For a more profound understanding, the 100 Series lawn tractors utilize a 3-speed gear transmission system which is mechanically operated, and supports manual steering with a two-wheel drive setup. The gear shifting issue primarily emanates from mechanical malfunctions within the transmission system. The core components involved in changing the transmission are the transmission belt, clutch plates, and gear shift linkage. Wear and tear or damage to any of these vital parts can hinder the smooth transitioning of gears, leading to a difficulty in shifting. For instance, a worn out transmission belt may not adequately transfer the required power, a damaged gear shift linkage could misalign the gear setup, and worn clutch plates might not engage or disengage the gears properly when required.
In rare cases, transmission failure and irregular gear changing have also been reported, which could be due to more serious internal damages or malfunctions Addressing these issues promptly is crucial not only to ensure the longevity and operational efficiency of your 100 Series lawn tractor, but also to avoid further damage which might lead to more costly repairs down the line.
How to Fix Difficulty Shifting:
- Check Fluid Levels: Ensure that the transmission fluid is at the recommended level. Replenish it if necessary.
- Inspect Transmission Belt: Look for signs of wear and tear, and replace the belt if needed.
- Examine Clutch Plates: Check the clutch plates for wear and replace them if they appear worn out.
- Inspect Gear Shift Linkage: Check the gear shift linkage and replace it if it is damaged.
- Clean or Replace Filters: Ensure that the filters are clean and free from clogs, replace them if necessary.
- Professional Inspection: If the problem persists, it’s advisable to seek the help of a professional technician to diagnose and fix the issue.
6. Battery Issues
The most common issues related to battery problems are often due to a weak or dead battery, faulty charging system components, or poor battery connections. The battery may fail to charge due to a faulty alternator, voltage regulator, or charger. Additionally, dirty or loose battery terminals can also hamper the effective charging and power supply of the battery, making it difficult for you to operate the lawn tractor efficiently.
When diving into the causes of battery issues, the specifications of the 100 series lawn tractor’s electrical system play a vital role. This model operates on a 12-volt battery with a Cold Cranking Amps (CCA) rating of 135, grouped under U1 battery group. When your lawn tractor experiences starting problems, one frequently reported issue is the difficulty in turning over the engine due to a weak or dead battery. It’s crucial to ensure that the battery maintains a good charge and the connections are secure and clean to ensure a smooth start and operation.
The charging system, comprising the alternator and voltage regulator, is fundamental in keeping the battery charged. Any malfunction in these components can lead to a failure in recharging the battery, thus potentially rendering your mower inoperative over time. It’s not just about the battery; the charging system is the lifeblood that keeps the battery ready and able to support the mower’s operational demands. Besides, a faulty charger could be a villain in this scenario, not replenishing the battery’s charge as required, which was highlighted in a common problem faced by owners.
How to Fix Battery Issues:
- Check the Battery: Inspect the battery voltage level using a multimeter. A fully charged battery should read around 12.6 volts. If the voltage is lower, consider charging the battery using a reliable charger.
- Clean Battery Terminals: Ensure that the battery terminals are clean and tight. Use a wire brush to clean any corrosion or dirt off the terminals to ensure effective connections.
- Check the Charging System: Inspect the alternator and voltage regulator for any faults. If they appear faulty, consider replacing them to ensure the battery gets properly charged.
- Use a Reliable Charger: If you use an external charger, ensure it’s working correctly. Replace the charger if it does not charge the battery adequately.
- Battery Replacement: If the battery is old or continually fails to hold a charge, it might be time for a replacement. Opt for a new battery with a similar or higher CCA rating to ensure it can handle the mower’s starting and operational demands.
7. Deck Wear and Tear
The most common issues related to deck wear and tear are belt slippage or snapping, and uneven or rough mowing. The root cause of these problems often lie in worn out or incorrectly tensioned belts, accumulation of debris, and unlevel mower decks.
Deck wear and tear in lawn tractors primarily emanates from a few mechanical discrepancies. Firstly, the mower drive belt may experience slips or even snap within a short span due to wear and tear, incorrect belt tension, or debris caught in the sheaves. The repercussions of a damaged drive belt can lead to excessive vibration, hence making the mowing process cumbersome and less efficient. Additionally, uneven mowing, a common irritant, might result from an unlevelled mower deck, dull blades, or high-speed movement. This irregular mowing not only affects the aesthetics of your lawn but can also signify underlying issues with the mower deck’s alignment or the sharpness of the blades.
The mower’s deck wheels and tire pressure also play a crucial role in ensuring a smooth mowing experience. Misaligned wheels or uneven tire pressure can exacerbate the wear and tear on the deck, leading to an uneven cut. The deck belt tension is another significant factor; if not adjusted properly, it can lead to squealing belts or slow turning blades, further contributing to the wear and tear of the deck. A meticulous inspection and timely resolution of these issues are imperative to prolong the life of your lawn tractor.
How to Fix Deck Wear and Tear:
- Disengage the blades before initiating any repair work.
- Inspect the mower drive belt for any signs of wear or incorrect tension. Clean out any debris caught in the sheaves.
- Replace the transmission drive belt if it’s damaged, ensuring it’s properly tensioned.
- Ensure the mower deck is level to prevent uneven mowing. Adjust the mower deck wheels if necessary.
- Sharpen or replace dull blades to improve the cutting efficiency.
- Check and adjust the tire pressure to ensure they are level.
- Run the lawn mower at a moderate speed to prevent rough mowing and additional stress on the deck components.
8. Ineffective Headlights
The most common issues causing ineffective headlights are low lumen output from the stock bulbs, and sometimes, electrical problems leading to non-functional headlights.
These Series tractors, including models such as the D100, D105, D110, and so on, are known to have problems related to their headlights. The stock bulbs, usually rated at 65 watts, may not provide adequate lighting, especially during low-light conditions or nighttime usage. This problem could potentially hinder your ability to work during dawn or dusk and even pose safety hazards. The electrical system of these mowers, specifically the alternator and battery (which operates at 12 volts) also plays a crucial role in powering the headlights efficiently.
Any issues in these electrical components could further exacerbate the headlight problem. The mechanical attributes like the two-wheel drive and manual steering do not directly contribute to the headlight issue, but having adequate lighting is essential for safely operating and maneuvering the mower, especially in challenging terrains or during adverse weather conditions. Faulty or inadequate headlights could lead to uneven cutting patterns as visibility of the terrain gets compromised, which is one of the common problems mentioned in different forums and websites.
How to Fix Ineffective Headlights:
- Upgrade Your Bulbs: Opt for higher lumen bulbs such as the HIR1 bulbs which are compatible with John Deere tractors. These bulbs, although also rated at 65 watts like the stock bulbs, provide better lighting. Ensure that the new bulbs are compatible with your specific model.
- Check Electrical Connections: Inspect the wiring and connections between the battery, alternator, and the headlights. Ensure there are no loose or corroded connections which can affect the power supply to the headlights.
- Consider Additional Lighting: If necessary, consider installing additional lighting solutions like LED light bars or auxiliary lights to improve visibility. Products like the CHUSYYRAY LED Headlight Bulbs are compatible with various John Deere models and provide better lighting.
- Regular Maintenance: Regularly check and maintain the electrical system of your mower to ensure it is in good working condition, which in turn, will help in keeping the headlights functional and effective.
If you don’t already own a one, should you buy it?
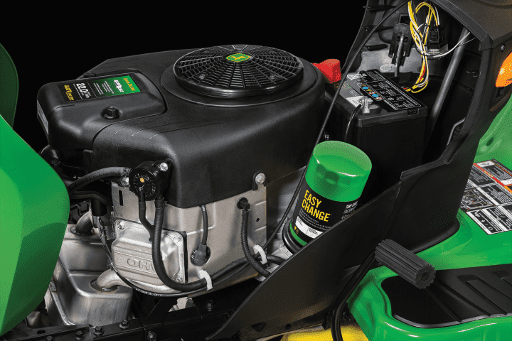
This workhorse, particularly the S130 model, is praised for its comfortable high-back seat, easy-to-use controls, and the Edge Cutting System which provides superior cut quality. Its ability to handle a range of yard tasks—thanks to additional attachment options like baggers and spreaders—is a highlight. Moreover, maintenance is simplified with features like the Easy Change 30-Second Oil Change System which significantly reduces the time and effort required for oil changes.
However, several considerations might deter a potential buyer. For starters, common issues with the model Series have been reported, such as starting problems, poor brake performance, pulley squealing noises, hydraulic system overheating, difficulty in shifting, battery issues, deck wear and tear, and ineffective headlights. These issues could potentially lead to additional maintenance costs and downtime. Furthermore, although the tractor is appreciated for its simplicity in servicing, the reported problems could be a hassle for some users, especially over time.
Users have also expressed concerns regarding the headlights which may not provide adequate lighting during low-light conditions. This could hinder your ability to work during dawn or dusk and even pose safety hazards. Additionally, the hydraulic system overheating can lead to transmission system failure if not addressed promptly.
Comparatively, a similar model like the Cub Cadet XT1 Enduro LT 42 in. 547 cc Engine with IntelliPower Hydrostatic Gas Front-Engine Riding Lawn Tractor might be a preferable choice for those looking for a tractor with fewer reported issues.
These series tractors are praised for their cut quality and ease of maintenance but the common issues mentioned might require a potential buyer to be prepared for some troubleshooting and possibly some additional maintenance expenses. Hence, if you’re looking for a hassle-free experience, you might want to explore other options.
Why trust Igra World?
Gleaning insights from a plethora of resources, our seasoned mechanics at Igra World meticulously analyzed the Series lawn tractors. They identified and tackled various problems—engine starting issues, transmission glitches, and fuel system anomalies among others. Their findings congealed into a comprehensive troubleshooting guide, amalgamating practical experience with a systematic investigative approach.
However, despite our extensive efforts, this tractor exhibited inherent design flaws that negatively impacted its reliability and performance in real-world scenarios. Our guide, albeit thorough, revealed a disconcerting narrative—a narrative of a machine beleaguered by too many issues, necessitating an unpalatable amount of maintenance and repairs. The exigency of frequent troubleshooting, underscored by our exhaustive guide, painted a picture of a lawn tractor that, although robust in theory, faltered in practice. Through our rigorous examination, we unearthed issues that went beyond mere operational glitches, delving into realms of design inadequacies that, regrettably, marred the user experience significantly. Through the lens of seasoned professionals, this mower emerged as a model that demanded more attention and remediation than what might be palatable for the average lawn tractor owner.