Your lawn tractor or riding lawn mower battery is similar to any car battery. It functions in the exact same way and asks for the same amount of attention. After giving you many years of service it is warranted that like a car battery your lawn mower battery will plead for replacement. And this should not go unheard.
Q: How to Change a Riding Lawn Mower or Lawn Tractor Battery? A: The way to change a riding lawn mower or lawn tractor battery is just like in a car. It needs to be disconnected, then unbolted and then removed. Followed by doing these steps in reverse for the newly installed batter.
Step 1: Does Your Lawn Mower Battery Need A Change?
How to change a lawn mower battery comes second. First, it is important to understand whether your battery actually needs a change. Here are some ways to take out the guesswork to be sure if or not your mower needs a new battery.
Check your mower for any problems with interlocking or resistance. If everything else looks good but your mower is not ready to budge then the battery could be weak or even dead.
If the battery is weak then it is time to buy a new lawn mower battery. You may at times be able to revive the battery with your charger but if the voltage is less than 7.5V then the damage is already severe. Also, if the battery does not hold a charge after some hours then it is time that you replace it.
Tools Required for Changing Lawn Mower Battery
- New lawn mower battery
- Safety glasses
- Latex gloves
- Wire bristled brush
- Adjustable wrench
- Baking soda solution
How to Change your Riding Lawn Mower’s Battery: Step-By-Step

Here are the simple and easy steps to follow to DIY riding lawn mower battery change which can be completed in 5-10 minutes.
- Safety should take priority and you need to make sure that you protect your eyes and skin from leaking battery material or any sharp edges and hazards.
- Park the mower on a flat surface. Turn off the engine and stop the moving parts and the blade. Let the lawn mower sit and cool off for some time.
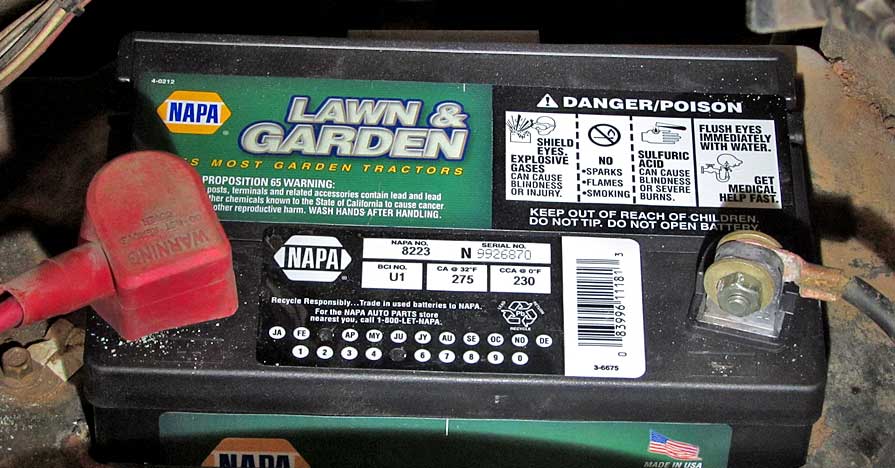
- Locate the battery in your mower. Usually, you will find the battery under the hood or the seat in the case of riding mowers. The push mower batteries are mostly located on the deck and in a black box close to the handle.
- Mix one cup of water and a teaspoon of baking soda in a disposable cup. Mix the contents well so that the baking soda is completely dissolved. Now pour this solution on the battery terminal. This will dissolve the corrosion that may have bound the terminals and the battery cables.
- If your mower model has a battery stabilizing bracket then insert a screwdriver with a flat head into the bracket. Turn the screwdriver in a counter-clockwise direction to push the bracket on one side and loosen the screw.
- Use an adjustable wrench and place it on the negative terminal. Then turn it in the counter-clockwise direction to loosen it. You can easily spot the negative terminal which has a (–) sign on it. The black battery cable will be connected to it.
- Carry out the same method to loosen the red battery cable or the positive. Now pull each of the cables up and detach it from the old battery. Use the center cable to take out the battery from its battery box and then set it on the side.
- The battery terminal cleaner should be inserted in the battery cable with the pointed end facing towards the cable. Turn the cleaner in a circular motion to clean any corrosion or dust. These are responsible to stop the battery from working properly. Clean each of the cables till you can see that the circles inside are shiny. Use a shop towel to wipe the excess metal shavings.
- Place the new battery into the box. With your forefinger, apply a thick petroleum jelly coat on the terminals of the new battery. This will not let the battery develop corrosion.
- The positive or the red battery cable should be placed on the positive terminal. Use an adjustable wrench to tighten it. The black or negative terminal should be placed in the same manner.
- Replace the bracket and then tighten the screws in a clockwise direction to hold the battery in place.
- Do not throw the old battery carelessly as these are toxic. Instead, take it to a recycling center or to an auto parts store where they will dispose of the battery properly.
Tips on Replacing The Battery
Lawn mower batteries are not universal which means that you need to get the proper battery to match your lawn mower model, type and brand. Also, make it a habit to check the battery for corrosion at least once every month. Follow the owners’ manual to make sure that you charge and maintain your battery properly.
Taking Care of the Mower Battery
A lawn mower battery should typically last for 3-4 years. To use it to its full potential and prolong its life, keep it clean and dry and protect the terminal of the battery from corrosion in the mowing season.
When wintering a riding lawn mower, disconnect the battery and keep it in a dry and clean place where it will not freeze. A 12V charger should be used to keep the battery in its optimum condition.
Conclusion
Lawn mowers need a battery to start and educating yourself on the correct ways to change the battery saves you time as well as money. If your mower battery signals a change then do not fret. Just follow this step-by-step guideline to swap your old mower battery with a new one to let your riding mower run and stay strong through the season.