Mowing is an important activity if you have a lawn and intend to keep it clean and low. A mower is by far the most crucial tool for lawn maintenance. A lawn mower is designed to last for decades with the proper care and service, but sometimes, it may leave you a little disappointed when you want to use it.
You notice the grass is tall and needs mowing, you try to put on your mower to do the work, but it just wouldn’t come on. At first, you think, oh, it may have something to do with the starter; after all, it’s winter where it is common to have starter problems. But then you realize it is something more.
Typically, when you’re having issues starting your lawn mower, it might be an issue with one of the following: fuel/oil, spark plug, or induction coil. If you’ve checked the fuel and spark plug, and they don’t seem to be the issue, you’re most likely facing a coil problem. Here, a multimeter set at ohms reading can help you test the coil to know if the coil needs replacing.
If you don’t know how to use a multimeter to check the coil of a lawn mower, do not worry as a lot of people struggle with this too, this is why we’re creating a guide with simple steps you can follow.
Use of a Coil and Continuity Testing
The coil of a lawn mower is located close to the flywheel. The flywheel spins as you pull the starting rope, while the magnet attached to the flywheel near the coil generates a voltage by induction. Before the engine starts, there has to be a spark that ignites the combustion chamber.
The coil goes round a hold over a thousand times which makes removing it to check for any break impractical. Continuity testing is employed to check for breaks without removing the coil. When you test for continuity and get a finite number, usually around 2500 to 5000, the coil is intact and is not broken. When you get an infinite number, it shows the coil is broken and needs to be replaced.
Why Use a Multimeter?

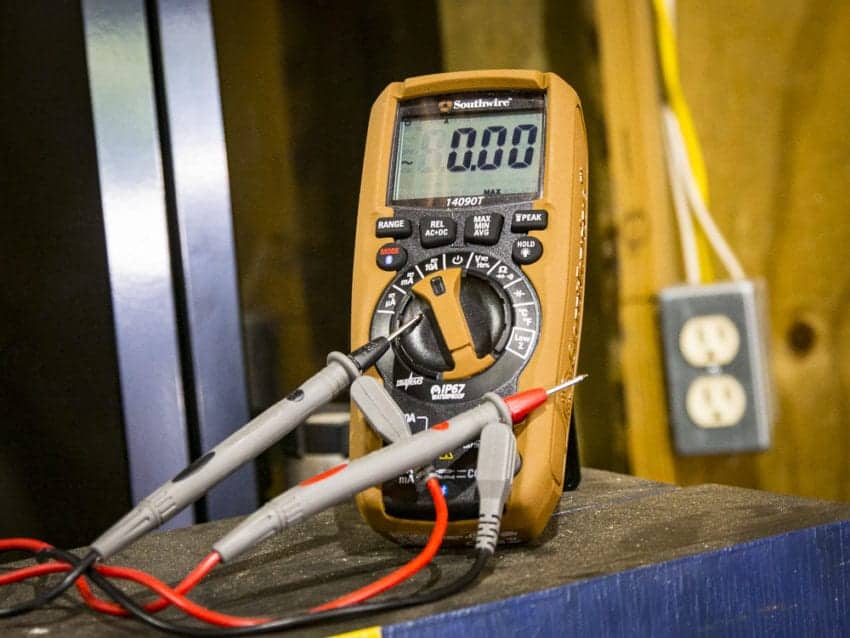
A multimeter is a device used to measure multiple quantities, including ohms, as in this case. The multimeter can test for continuity and let us know if the coil is bad and needs replacing.
Typically, using a multimeter to check the coil is like a fault detector. Before you can be sure of the fault, you have to test, and this is where the multimeter shines. If you’ve replaced the spark plug and successfully checked the fuel and air circulation, it may be time to bring in that multimeter.
Things to Check Before Testing Ignition Coil

The ignition coil is hardly the first troubleshooting your lawn mower gets if it is having problems starting. There are some other, often specific things you can check first before proceeding to the coil if the issue persists.
#1. Check Fuel, Fuel Filter, and Air Circulation
If you’ve not used the engine for a long time, the fuel might have gone bad and needs changing. Replace the fuel in the tank with fresh fuel and dispose of the old fuel. Fuel additives can help clean out debris from the carburetor.
Check that the gas cap is open and there is no debris clogging it. The gas cap will typically have vents that allow for proper ventilation and improve the carburetor flow.
The fuel filter traps dirt in the fuel as it moves from the tank to the carburetor. Throughout its job as a fuel sieve, it will become clogged with dirt which will then reduce the optimum flow of fuel into the carburetor. When this happens, you need to replace the fuel filter.
You should also check the air filter that serves as a sieve removing dirt from the air entering the engine. With time, even this filter itself becomes clogged and cannot work effectively. In this case, replace the air filter.
#2. Check Spark Plug
The spark plug is the next thing to check after examining the air filter and fuel. The plug is often overlooked and gathers black soot over time which shows that it has been overworked and spark plug needs to be changed.
Remove the spark plug by raising the spark cover and twisting the plug till it comes out. Examine the plug for black soot. Replace the spark plug if you find black soot on it. Luckily, it is very affordable.
#3. Check Oil
Too little oil, too much oil, and bad oil can all cause your mower problems. Check the oil and examine its color. Black oil shows the oil is bad and needs replacing. Remove the bad oil and replace it with fresh oil. Ensure you use the recommended oil.
Sometimes, the oil is depleted, which causes problems. In this case, top up the oil but ensure not to overfill the tank.
#4. What You Need to Check Ignition Coil
Here are what you will need to check your coil:
- A multimeter that can read resistance (ohms)
- A wrench to get access to the coil
- Your lawn mower owner’s manual
- Leather gloves
Steps to Check Coil With a Multimeter
If you’ve gone through the other tests without any luck, it may be time to check the ignition coil with a multimeter. Here are simple steps you can take to test your coil:
- Open the Mower
Before you can access the coil, you have to open the mower, and this is where your wrench comes in as you work your way into the mower.
First, remove the spark plug cover. Yes, that rubber covering the spark plug. You can remove the cover by pulling it up a little. Next, you should remove the engine cover to get into the engine where the coil is located. Now, some mower types, especially riding mowers, do not have engine covers as they use hoods. - Locate the Coil
After opening the engine, you will find the coil close to the flywheel, which rotates as you pull the starting rope. The flywheel is typically circular with several blades. If you’re unsure, your owner’s manual is an excellent place to check for guidance. Another good place to start is to follow the spark plug wire through to the metal box. You’ll find the coil in the box where the plug wire is attached.
- Set the Multimeter
At this point, you can go ahead to set the multimeter to read resistance in ohms. You can do this by placing the read lead into a socket with the ohms signal.
- Test the Coil Using the Multimeter
Disconnect all wires attached to the coil. You’ll find that you cannot disconnect the spark plug wire, so pull the other end of the spark plug wire connected to the spark plug. This would improve safety and also ensure the effectiveness of your reading.
Ignition coils are made to last for a really long time, but this is not often the case, with several factors increasing the likelihood of a break somewhere along the coil. As earlier mentioned, it is impractical to check the coil for a break or burnout manually, so using the multimeter is a better option.
To test the coil using the multimeter, touch the positive multimeter probe to the spark plug and the negative probe to the metal extending from the second terminal you’ll find on the ignition coil. Bear in mind the positive probe is red while the negative probe is black.
You’ll notice a spike in the readings on the multimeter. Allow the readings to become steady, and then check the value. A value of 2500 to 5000 ohms means the coil is still in good condition, whereas a value of 1, infinity, or if there’s a sharp movement to the far right, indicates the coil is bad and needs to be replaced. - Replace Damaged Coils
From the results, you’ll know if you have to replace your ignition coil. If you find that your ignition coil is damaged, purchase a new ignition coil, ensure it is the coil recommended by the manufacturer in the owner’s manual.
Replace the damaged coil with the new coil and close the engine properly. - Test Again and Enjoy
Test the coil again with your multimeter and watch the value fall into the range for working coils. With this, you should’ve solved your starting issue and can now enjoy your lawn mower.
Conclusion
Trying to use your lawn mower only to discover it won’t start can be so frustrating. Most times, it can even cause you to use extreme force to pull the starting rope and break it in the process. Luckily, this article shows you an easy and effective method to test your ignition coil with a multimeter.
